Showing posts with label Love My Fabrics. Show all posts

Friday, May 8, 2015

Love My Fabrics Project-Wall Holder!

 
Hi there crafters!
Rachelle here and I am up on the LMF blog today to share my latest
Love My Fabric project.
  This project is super simple and will add color and organization to your space.
This project is completely no-sew! You could easily modify it with a few straight stitches for a more personalized or practical product.
Let's take a look.

 
Fabric Wall Pocket Holder 
 
Materials needed:
Embroidery hoop-8 inch
  Fabric (2 coordinating)


Lay out your background fabric over your inner embroidery hoop.
 

Lay your pocket fabric, folded in half, over the background fabric.  You can place it half way in the middle, higher or lower, depending on what you plan to put in the pocket.
Now slip on the outer hoop and tighten.  Gently tug the fabric around the edges to make it taut inside of the hoop.  This is the part where you make sure you are happy with the placement of your pocket or how the print on your fabric is situated.  If you’d like, you can add a couple vertical stitches down the pocket for pencils or one in the middle to divide the pocket into two. This, of course, would be done before you place the fabric in the hoop.  When you are satisfied with it you can cut the excess fabric or tuck it behind the hoop.  Be sure to tighten your hoop real tight so that the fabric doesn’t slip out.


So that’s it!  Quick, huh? 
And so easy, not to mention clever. And since there is no glue involved, you could easily change out the fabric whenever!


Hang it on the wall and use it for notes, pencils, or outgoing mail.
 Sort important reminders, postcards or invitations.
I really hope this inspires you.
  I’m sure you will think of some interesting ways to use this holder.
That's it for this post.
Thanks for stopping by today!
 
Happy crafting!


Friday, April 24, 2015

Love My Fabrics Altered Art Holder


Hi there friends!
Rachelle here and I am up on the
Love My Fabric's Blog today
 sharing my altered art project.
It is a Pen/Marker Holder that sits right on your work table.
The holder is super easy and quick to make.
Here are some easy directions.
Work Holder
 

Things needed:
*Basic Can Good
*Ribbon-5/8 width & 1/4 width
*Glue
*Fabric Square
*Cardstock


First thing to do would be to measure the can on the outside and inside.
Next, place the measurements on your fabric and cut out.
 I love how easy this material cuts without fringes.
Do the same on the cardstock and cut the paper that will be placed inside the can.
More Views:
Now apply glue on the cardstock and place inside the can. Then apply glue to the fabric apply it to the outside of the can. Allow the glue to set.
Now apply the ribbon to the inside top of the can followed by placing the ribbon, around the rim and lower edge of the can. Then I apply the smaller ribbon right below the the rim ribbon and the lower edge ribbon.
 

Finally, give the holder a cute touch by placing a bow in the center of the can. Then I placed a paper daisy in the center of the bow. Allow to dry.
 ALL DONE!

Now you have a cute little supply holder for your work table.
It's perfect for markers, pencils, brushes, and scissors!
That was quick, fun, and easy peasy!
Perfect for yourself and as a gift.


That's it for this post.
Thank you for stopping by today and remember to stop by
Love My Fabrics for more creative craft projects!

See Ya Soon & Huggies!


Saturday, April 11, 2015

Love My Fabrics-Shaker Box Project!

Hi blog friends!
Rachelle here and am up on the LMF blog today sharing
my Shaker Box Canvas made with

 Take a look!

"Life is Good"

I started by using a 5x7 canvas then measured it 
on top of the fabric cut and it out a square.
The fabric cuts so easily without stray threads.
Next, I applied the fabric like gift wrapping to the canvas 
using my tacky glue.
{Be sure to apply the fabric to the front with the edges glued around the square opening in the back.}

More views:


 Next, its time apply the acetate clear cover. First, I placed
sand, sea shells, pebbles, and sticks inside the square opening.
Now it's time to apply the acetate window on top of the square
using tacky glue. Allow to dry followed by applying burlap twine and white twine around the square.
 

I had this cute nautical set in my stash so I used it along with
adhesive greenery. The lighthouse and achor look great.
 
 
There you have a finished shaker box!
I trust you have enjoyed this project. The perfect wall hanger!
 
That's it for this post.
Thank you for stopping by today and remember to stop by
Love My Fabrics.
Esty Shop Love My Fabrics

See Ya Soon & Huggies!


Wednesday, March 25, 2015

Love My Fabrics Canvas Project!

Hi there crafty friends!
Rachelle here and I am up on The Love My Fabrics blog today
 sharing a cute shamrock project.
Quick, simply, and easy.
Take a look!

"Lucky"

First I used took burlap and wrapped around a 4x4 canvas. Next, I applied
a small white doily in the center. I used a simple glue stick for adhesive.
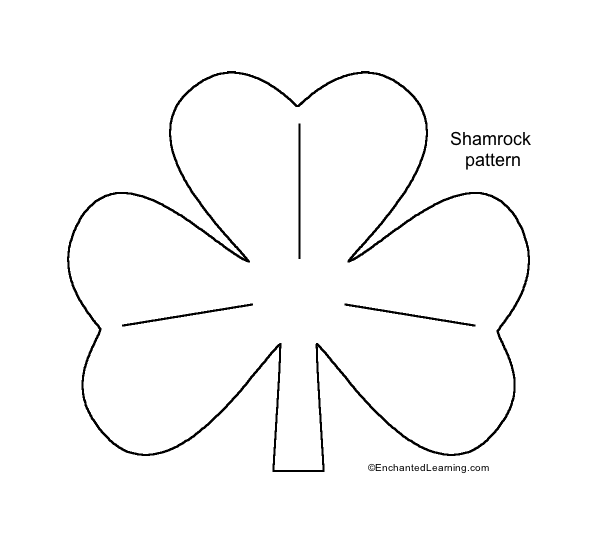
Then I used the pattern below to create the shamrock.
http://enchantedlearning.com/crafts/stpatrick/Shamrocktemplate.GIF

Once I cut out the shamrock I used embroidery floss to place hand sew stiches
around the shamrock. Just apply it to the canvas on top of the doily.

 
 To finish up, I applied Thicker lettering, rhinestones, bows, and metal corners
to the corners of the canvas.
There you have it! All finished!


That's it for my first post.
I hope you enjoyed this project.
Thanks for viewing and stopping by. See ya soon.


Thursday, January 15, 2015

Love My Fabrics Canvas Pocket Project

Hi there friends!
Rachelle here today on the blog to share my
project which does not require sewing.
Sounds great? Let's have a look.


This is a 3-pocket canvas holder that can be placed just about
anywhere in your craft space area.
I created this pocket holder so that I could attach it
to my cork board.

 It is great to hold items you use a lot.
Here you can get the idea of what it can hold.
 My distressing tool, small scissors, distress markers, and pencil.

It was easy and quick to make. I used my hot glue gun to 
apply the pieces together. I also used tacky glue for the flowers.
It is great to carry along for the crop events.


This holder is great for paint, sprays, and brushes.

Well that's it for now. There is more to come. So be sure
to check back for more inspiration using fabrics.

Thanks for stopping by today!

See Ya Soon & Huggies!!


Monday, December 29, 2014

Love My Fabric~Fabric Storage Tips!

Hi there fabric lovers!
Rachelle here with my first post on 

Today I am sharing a few
easy peasy tips to store your fabrics.
I use to love creating all sorts of thing on the sewing machine.
These days I love using fabric to create
 scrapbooking, cards,altered art, and mixed media projects.
Click on the Snapguide for the steps.


So there you have it!
Easy peasy tips I hope you will use.

Thanks so much for stopping by! Be sure to check back for more!
See Ya Soon!
Huggies!!!


Friday, November 28, 2014

DT Annoucement!!!

Hi there all. Rachelle here and I am so excited and honored to introduce myself as a Love My Fabrics design team member. This is such a fantastic team of creative ladies to be a part of. I am from the buckeye state of Ohio. I started using fabrics and sewing during my teenage years. I made so many things and now I have fun using fabrics while scrapbooking, mixed media, card making and so much more. 

Take a look at a few projects:


 Mixed Media Canvas


Card Making


Scrapbooking & Mixed Media


Wreath


Altered Art

These are just a few projects I have created. Now, I look forward to designing and sharing inspirational Love My Fabrics projects in the days ahead.
Thanks so much for stopping by today.


My Sites You Can Check Out: